
Showing posts with label BLOG TRICKS. Show all posts
Random Post Widget and Script for Blogger Blogs
Wednesday, September 30, 2009
Random posts widget displays random links of your blog. This help show content that is neither recent nor popular (because it is random :)). The widget displays links in form of link lists. I am so damn sure that this widget will definitely bring some excitement to your blogger powered blog. Letting your readers surf your blog to the fullest extent by creating a link to a random post in your blog's sidebar.
Installation and Customization:
1. Log into Blogger >> Layout >> Add a Widget .
2.Then paste this code into the text area
3. Change the number of posts links you want to display.Just change the number to anything you want !
numofpost=5
4. Change the number of words you want to include in the summary to display.Just change it again into what ever you want again !
wordnumber=5
5. Then just save the template and view your blog !


Convert HTML to Javascript using converter
This clever utility converts normal HTML code to dynamically generated JavaScript instead. Very useful in applications where the code must be dynamically generated, such as contents inside a JavaScript scroller, text of a random quote script etc.
Type in regular text or HTML code, and presss the convert button:
Type in regular text or HTML code, and presss the convert button:
Blogger Ad Code converter(embed script anywhere in you XML)
This handy tool automatically converts javascript ad code into the correct format so you can embed it directly into your new xml Blogger template. It’s perfect for converting AdSense, AdBrite, Chitika or any other javascript ad code you may have.
Just paste your HTML code in the text area and click “Convert”.
Just paste your HTML code in the text area and click “Convert”.
Top 10 Blog Directories to Submit & Get Traffic, Backlinks
Gaining exposure for your blog is critical to building a following, readership, and revenue.
Besides the basic SEO steps of adding compelling and keyword friendly titles, URL structure and descriptions (along with the basic Wordpress SEO plugins) basic link building for blogs begins with listing them in blog directories.
10 Blog Directories which Gets Traffic & Backlinks to your Blogs
There are various blog directories available, but I would like to list 10 of them which I have found useful.1) Bloggeries – Bloggeries is a good blog directory which accepts blogs and has various sub categories. It also has features such as forums, listing of the most viewed blog, latest blogs etc.
2) Blogged.com – This is a free directory and shows the postings of the blogs as a News feeder format. This has various features such as following others, starting discussion etc.
3) Blog Explosion – Blog Explosion is another free blog directory which helps in getting traffic to your site. Once you submit your site, it would take up to 7 days to get your site approved or rejected.
4) Super Blog Directory – This is another blog directory with useful features such as the latest submitted links and blogs, most popular blogs, top rated blogs etc.
5) Bloggapedia – Bloggapedia is another free blog directory with a good layout and helps to see the most popular searches in the directory.
Featured Top 10 SEO Mistakes in Blogging
6) Bloggernity – Another blog directory which is free and worth for blog submission. Offers features such as forums, blog search etc.
7) Blog Universe – Blog Universe is another unique blog directory which is used to submitted video and podcast blogs.
8 ) BlogCatalog – This blog directory serves as a social community for bloggers and helps in searching, connecting with other bloggers, promoting your own blog etc.
9) Blog Hub – Another important blog directory with features such as new blogger list, hot topics etc.
10) Spill Bean – Spill Bean is another attractive and simple blog directory which helps you to submit your blog for free.
There might be other blog directories which I have missed, but these 10 directories seems to be more important to me. Hope you have enjoyed reading this.
Download iLangit Blogger Theme for web 2.0 and tech blogs
Langit is the latest and coolest “make money” blog template to hit the scene here at eBlog Templates. It’s a very modern, web 2.0, 3 column, black and blue template with a ton of features including some never before used in a Blogger template! We really try to push the limits with our latest and greatest templates and know you’re going to love this one.
This template will work right out of the box but in order to personalize it just for you, it’s going to take some work. You’ll need to edit the template code which is usually for more experienced Blogger users but anyone is welcome to try of course. The difficulty level is a 9/10 so be prepared to sit down and spend some time setting this template up.
It looks something like this !
Features Include:
* Several different types of highly optimized “Make Money” ad spots
* Built-in FeedBurner rss and subscribe via email area
* Top box displaying your 10 most recent posts (yes I said 10)
* Calendar style date on each individual post
* Header banner rotator
* Dynamic top tabs so you can easily add them
* Custom comments section
* Live website traffic widget from FeedIt
* And much more…
This is the first ever Blogger template that includes a very cool header banner rotator so you can randomly display several different banners in one spot! View the demo and try reloading the page a couple times to see it in action. There are four different banners sharing that spot.
Here’s a quick screenshot of how the comments section looks on this template. It’s very unique and not your boring Blogger-style look which makes the Langit template so special.
Let’s Configure this Template!
Ok, you’ve got your beverage of choice, a comfortable chair, and are now ready to setup this new template for your blog. We’re going to start from the top and work our way down and I advise you to make backups of your template along the way. Also, always remember to check the “expand widget templates” checkbox in the edit html window of Blogger otherwise you won’t see the entire template code. Let’s begin.
Step #1 - Setup Your Header Banner
The 468 x 60 header banner is a great spot to advertise and you’ll see this spot being used on many websites. The banner spot on this template is an HTML/Javascript widget so you can easily paste in whatever code you want. You actually have several options so choose the one that works best for you.
Option 1 - I don’t want to mess with the code now right now and can always come back later. Let’s keep the existing banners. This is also a good choice if you don’t have any banners to use at this time. If you don’t have any banners to use, I recommend signing up for at least one affiliate program like Text Link Ads, or LinkWorth which will give you banners. If you click on the banners in the demo, it will take you to the sites where you can sign-up.
Option 2 - I don’t like ads and want to remove it. Sure, just delete the widget from your blog.
Option 3 - I only have one banner and don’t want to use the banner rotator script. Ok, no problem. Just edit the banner widget and paste in your single banner code. It will automatically remove the banner rotator and replace it with your new banner.
Option 4 - I’ve got plenty of time and a few banners and want to set this thing up now. Perfect! In order for you to get your banners to work properly, you’ll need to run the javascript banner rotator script (you’ll need to have your banner images hosted somewhere before using the banner rotator script otherwise it won’t work) to give you the proper code and then just paste it into the banner widget box within your layout page. This will automatically remove the default banner rotator and replace it with your new banners.
Step #2 - Setup Your RSS Feed Using FeedBurner
Before moving forward, I recommend you first read our article on the basics of setting up FeedBurner for Blogger if you don’t already have an account. After you get your account up and running, you’ll need to edit the template code to update the FeedBurner section.
First, search your template code for id=”top_rblock” which is where you’ll find the FeedBurner code. Next, replace the “YOUR-FEED-NAME-HERE”, “YOUR-FEED-ID-HERE”, and “YOUR-BLOG-NAME-HERE” text with your FeedBurner provided info. You’ll also need to activate the email subscription feature within FeedBurner. (read the bottom part of the article describing where you get the code). There are a total of 4 places you need to update so make sure you got them all.
You’ll also want to add your own feed counter which shows the total number of subscribers you have. You’ll need to activate this first under “Publicize” –> “FeedCount” and then scroll down to click on “Activate”. Now you can change the colors and copy the code to use in your Blogger template. You’ll want to replace the following code in your template:


http://i254.photobucket.com/albums/hh92/eblogtemplates/langit/feed-counter.gif
with something that looks like this:
http://feeds.feedburner.com/~fc/myfeed?bg=99CCFF&fg=444444&anim=1
Now your feed count will automatically update whenever someone subscribes to your blog!
Step #3 - Add Top Tabs
This is pretty easy actually since the top tabs are generated via a link list. Just go into your Blogger layout page and click “edit” on the “top tabs” widget. There you can add as many tabs as you want. The “home” tab automatically appears so you don’t need to create one.

Step #4 - Setup Advertising Accounts
You’ll need to have the following 3rd party accounts setup if you want to make money and use this template as designed. The ads currently in this template are placeholders and will continue to work if you’d rather not hassle with setting up new accounts or changing the code so it’s up to you.

* Google AdSense - Allows you to display highly targeted text advertisements for you to make money (create an AdSense account)
* Chitika - Displays related products below each blog post. You get paid for each click! (create a Chitika account)
After you’ve got your advertising accounts all setup, you can move on and configure the ad sections in this template.
Step #5 - Configure AdSense Sidebar 336 x 280 Ad Unit
You’ll first need to be familiar with Google AdSense and how to setup a new ad before changing this code. Make sure to use the matching colors which will not only make it blend in with your blog but will also increase clicks. The color scheme is as follows: border & background: 44494D, text & url: FFFFFF, and title: D7DFF0. Once you’ve got your new 336 x 280 AdSense block of code, you’ll need to convert it using our Ad Code Converter.

Take the output of that and then replace the existing code in the template. To find the code in the template, search for “adsense code start”.
Step #6 - Configure Chitika 468 x 90 Ad Unit
This is the ad unit you’ll find right below each blog post. It’s called “Related Products” and is a great way to make money from your blog. Each time someone clicks on your link, you get paid! It’s a PPC program (pay per click) just like Google AdSense but it’s run by Chitika. Check out the template demo and see for yourself. Try clicking on any of the links and see where it takes you. Much different than Google AdSense.

So after you’ve setup your account, you’ll need to create a new 468 x 90 Related Product Unit (RPU). You can generate the code by clicking on the “Get Code” tab within Chitika. Then it will walk you through creating an ad unit. You can even change the colors which we did on our ad unit (title: 2277DD) so it matches our site better.
Next, grab the code and then you’ll need to convert it using our Ad Code Converter. Take the output of that and then replace the existing code in the template. To find the code in the template, search for “chitika code start”.
Step #7 - Get Your Individual Post Date Stamp Working
Chances are when you first install this template your timestamp format won’t be set properly and you’ll see an “undefined” message instead of the post date. You’ll need to make one small change in your “Settings” => “Formatting” => “Timestamp Format” section before it will work. Change whatever you currently have to this format: “Sunday, April 13, 2008″ and then save. Make sure you change the “Timestamp Format” which is the 4th one down. Your template should now work properly.

Ok, that pretty much covers everything you need to properly setup this template. Oh, one more thing. On some blogs, the header blog name title is too wide and ends up wrapping which doesn’t look so good. You can easily change that by going into your Blogger “Fonts & Colors” section and making your title size smaller. Another option is to just shorten your blog name but I don’t think you want to do that.
Credits
This template was originally designed for WordPress by Eches and converted to Blogger by GosuBlogger. eBlog Templates saw a lot more potential with the nice template and decided to take GosuBlogger’s initial conversion to the next level by optimizing and adding several new features to help you make more money with your site.
Revision History
4/13/08 - Fixed json entry.title.$t javascript error so the template now validates correctly in both IE and FF.
4/14/08 - Fixed another javascript error only affected in IE. It was the FeedBurner form action url. Also made the subscribe box a small pop-up window instead of a new browser page.
Ready to super charge your blog? Check out our professional premium blogger templates or make money by joining our blog affiliate program!
Want to make your blog stand out from the crowd? I recommend giving your newly downloaded Blogger template a unique and personalized look. Read our Free Blogger Header Images article and find yourself a great custom header image!
If you like this post then please consider subscribing to our eBlog Templates RSS feed. You can also subscribe by email and have new templates and articles sent directly to your inbox.
Download iLangit Blogger Theme by Hack-Genius
30+ selected free magazine style Blogger Templates Free Download
Hi guys, here the top 30 Magazine Style Blogger Templates for your blogs.
1. Revolution church Blogger Template V1

2. Revolution church Blogger Template V2

3. Revolution Lifestyle blogger Template

4. Revolution Code blue Blogger Template

5. Revolution Code Gray Blogger Template

6. Revolution Code Red Blogger Template

7. Falker press blogger Template

8. Digital Statement blogger Template

9. Magazeen Blogger Template

10. Magasin Cuatro Blogger Template
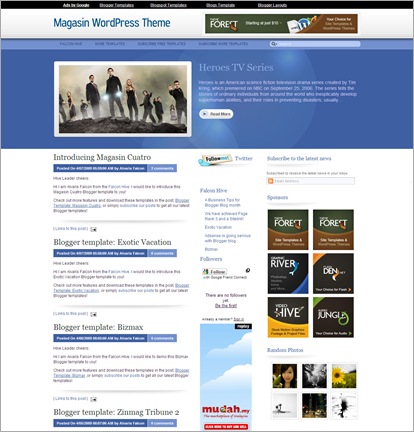
11. Comfy magazine Blogger Template

12. Magasin Uno blogger Template

13. Arthemia magazine Blogger Template

14. Daily Inspired blogger Template

15. Madmagazine blogger Template

16. Personal Mag Blogger Template
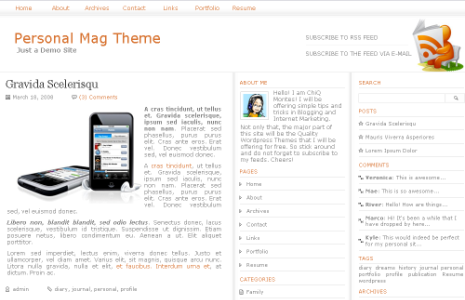
17. Indomagz Blogger Template

18. Revolution Theme blogger Template

19. Blue Steel Blogger Template


24. Vibrant Magazine Blogger Template

25. Langit Blogger Template
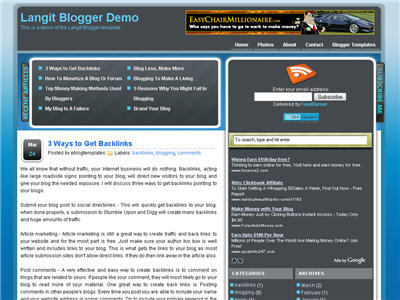
26. Rebel Magazine Blogger template


28. Turnout Mag Blogger Template

29. Scarlett Blogger Template

30. Maggo Magazine Blogger template

Google Site Map Maker Download
Thursday, September 10, 2009

Google Site Map Maker | 6.20 MB
Make a Google site map and increase your traffic.
Make a Google site map and increase your traffic.
Start Google Site Map Maker:
Step 1. Enter The URL of the website you wish to create a site map for. Google Site Map Maker will then crawl that site and make a list of all the links it can find.
Step2. Set a few features like how often your site content changes, this will help tell Goggle how often it should crawl your site!
Step 3. If there are any URL’s on your site you do not wish to have included into Goggle then list them in the bypass area so they will not be crawled and posted to your site map, you can also select file types to bypass such as .zip or .exe
Step 4. You can optionally add your sites FTP information and if you ask Google Site Map Maker to it will automatically upload your site map for you .
Step 5. Spider your site.
Google site Map Maker will:
* Spider your web site-
* Create a site map for your site
* Save a copy of that site map to a selected folder on your PC
* Upload a copy of your site map to yourdomain.com/sitemap.gz
* Thats right .gz the preferred Google Site Map format, it will zip and upload the site map for you.
But wait we are not done yet! After this process has been completed Google Site Map Maker will then ping Google and tell them you have a new site pam ready to be crawled! Is that powerful or what!
Picture this: you make Google site maps for all your sites quickly and easily. You submit them. Then you get huge hits—enough that you’re catapulted to the top of the search engines. Now you’re down at the bank cashing a big, juice check. Feels good, doesn’t it?
That’s the power of having “Google Site Map Maker” on your computer.
Uploading Links:
Click to Download
Easy-Share Links:
Click to Download
KewlShare Links:
Click to Download
Rapidshare Links:
Click to Download
Megaupload Links:
Click to Download
Click to Download
Easy-Share Links:
Click to Download
KewlShare Links:
Click to Download
Rapidshare Links:
Click to Download
Megaupload Links:
Click to Download
How to track your blog visitors? (Blog Tricks)
Sunday, July 12, 2009
As a new blogger(webmaster),it is always interesting to know how many people are visiting your blog/site,pageviews,where they are coming from,which sites are referring,how many are coming via Search Engines(google,yahoo,etc) and what they are typing in the search engines to visit your site.
These stastistics are very handy interms of improving your blog and it is for FREE
If you search the google,you will find hundreds of sites which will track the visitors of your blog/site.But,some sites will provide more information about your visitors than the others.
So,how to do this?
Here are the best tracking sources interms of the feautures they provide.
Note:One thing is common for all the tracking sites.First you need to register,and provide the necessary information about your blog/website.Next,they will give you a html code and you have to embed it in your blog.
How to do that in blogger?
1.Sign in to your blogger dashboard.
2.Click on the 'layout' link next to your blog name.
3.Click on the "Add a Page element"
4.Select "html/javascript" and past the code they provide and SAVE THE CHANGES.
From then,your blog will be tracked and you can check your blog stats from time to time after logging in to your registrate's website.
So,here are the good ones:-
Sitemeter.com:This one is one of the Most Popular tracking source.This is as simple as 123. Just create an account,copy the code from your account and paste it in your blog as suggested above.
You have also the option to keep your blog stats PRIVATE.
They will give you the stats on how many pageviews(hits) per day,unique visitors,geolocation of the visitors,how many users online,and much more...As it is simple(not much animation),you site will load as fast as it is before.Stats are updated hourly.
You can setup a Free Account here
Histats.com:Unlike the Sitemeter which is very simple, this site will have very cool and animated counters.


Tracking is updated every 5 minutes.I personally using this site for my blogs.Like Sitemeter,
this is also have the option to keep your site stats PRIVATE.
They will provide Animated graphs about your site visitors and fully animative.
You can register with them here
Statcounter.com:Same here!As in the name,it is a stats counter.It is fast,free,and quick loading.
Invisible tracking is available and no ads on your site.All the stats are in real time and super fast.It is not much animated as histats.com.They will provide pageviews,unique vistors,visitors activity,search engine wars,keyword analysis,and many more..
Register a free counter for your blog here

Adding meta tags to blogger(blogspot) blogs,websites-SEO (Blog Tricks)
If you don't know what meta tags are, and what is the importance of adding meta tags, here is the detailed description on how to add them to your blogger(blogspot) blogs or any website.
Do you know adding meta tags is so important if you want to get more traffic from search engines like google,yahoo,msn,etc,especially the meta description is the most important one.
If you don't know what meta tags are,Meta tags are the tags which describes your site and tells the search engines what your site is all about.Adding meta tags is an important factor in SEO.(Search Engine Optimisation).Meta tags allows search engines to index your web pages more accurately. In other words,Meta tags communicate with the search engines and tells more information about your site and make it index correctly and accurately.
Here is an example.This is what I got when I typed 'Kranthi tips' in the Google Search Engine.
As you can observe.'Tips and tricks............' is the meta tags description which I added to my site.
We have to add two meta tags to the head section of the template.One is the Meta description which describes your site and another one is Meta Keywords which tells about your site keywords(what your site is all about)
Here is how to add meta tags to your blogger(blogspot) blog:
1.Sign in to your blogger dashboard>click the 'layout' button[see the screenshot below]

2.Click on the 'Edit html' tab

Here is the code you have to add
| 'DESCRIPTION HERE' name='description'/>
'KEYWORDS HERE' name='keywords'/> 'AUTHOR NAME HERE' name='author'/> |
KEYWORDS:Write the keywords of your blog
AUTHOR NAME:Write the author's name(Your name)
3.Add the above code just after this [Look at the below screenshot]

Don't forget to add description and keywords.
and save the changes.
IMPORTANT:
Several people were filling with just the keywords in the description.DON'T DO THAT.Google and other search engines will ban your site from the search engines list if you did so.And also,don't repeat the keyword more than 3 times.
That's it!You have sucessfully added the metatags to your blogger(blogpsot) blog.If you want to check whether you added the meta tags correctly or not,just type 'meta tags analyzer tool' in the google and you will find so many sites which can check whether you have added the tags correctly or not.


